Applications of Photography
Task 1 Report
Part 1 - Don McCullin
Photojournalism
Early Work
Don McCullin, born 9th October 1935, is a British photojournalist widely recognised for his war photography and other photography work.
McCullin started out as a freelance photographer, taking and producing his own images. In his early days, when he started his photography career back in 1959, he examined the undersides of society. He photographed the poor, the unemployed and downtrodden people and began mixing with the local gangs from Finsbury Park. Here he started to photograph the violence he was experiencing which led to his recognition after a picture of London gangs appeared in The Observer in late 1959.
Immediately we begin to see Mccullin’s style of photography, the way in which he takes his images and some of the techniques he uses. Although his images are incredibly simplistic they create a huge impact on the viewer.
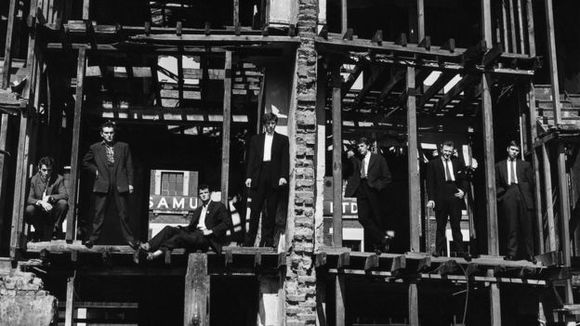
This black and white photograph which brought him to the attention of The Observer was taken in the bombed ruins of London after World War Two, showing the Guvnors posing for the camera. The cocky confidence of the men seem somewhat out-of-place in this building which has the front and back blown out. The vertical symmetry in down the centre of the building of the house is practically symmetric.
The foreground consists of rubble and partially cleared ruins of the building and leads to the mid third horizontal where each of the gang members has framed themselves within their own individual frame using the walls and rooms and supports. The top third consists of the roof area with supports continuing the same pattern as the two levels below.
Its natural lighting picks out the individuals who as they pose for the camera, taken from a low angle makes the ruins look bigger and makes and also the individuals more threatening.
War Photography
McCullin’s first war assignment began in Cyprus in 1964 when he stopped working for The Observer and began photography work for The Sunday Times. It’s important to note that although he was working for the papers McCullin fully produced his own images. The papers would come to him with a photography story they wanted publishing and McCullin would go out and return with the finished product.
This assignment was followed by the Congo, Vietnam, Cambodia, Israel, Biafra, Venezuela, Northern Ireland, Zimbabwe, El Salvador, Czechoslovakia, Uganda, and Lebanon. For twenty years McCullin was hardly away from any war or natural disasters. Initially his photography consisted of him shooting and running back to safety, but he later developed his technique by studying the subject before adjusting readings then taking the photographs which created some startling images that made him famous.
The Berlin Wall
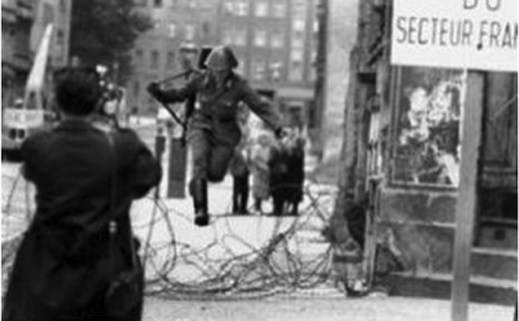
The Berlin Wall, this incident was spontaneous, nothing set up, the sentry just doing his rounds when all of a sudden there’s a gap in the wire, his superiors and colleagues are not paying him any attention so he decides there and then to go for a chance to escape to freedom.
The photographer in the foreground suddenly realises the situation and is in the process of getting his picture. The inclusion of both of the photographer and the ladies in the background who have just noticed what is happening helps add tension to the story. The setting is a drab street and the barbed wire has been there for some time as it appears to be collapsing giving the solider the opportunity of escaping by just doing an easy jump over it.
This photograph could easily have been missed but relies totally on the photographers intuition knowing somethings about to happen and reacting instantaneously which is taken within seconds of the decision to make a break for freedom as it catches the soldier in mid-air trying to remove his rifle from his shoulder which is hindering his moment as he makes his escape.
Later Life
Due to his disregard for rules and ignoring curfews McCullin has been shot at, ambushed, beaten, suffered broken bones and imprisoned several times all around the world. In the early 1990’s after a long hard career and the loss several close colleagues, he decided to move to Somerset, away from human misery. He still photographs human interest stories and seeks sanctuary in the countryside.
Don has written several books about his experiences during his travels and his photojournalism, he now concentrates mainly on landscape and still life preferring to put his past experiences behind him.
Part 2 - Rankin
Portrait and Fashion Photography
John Rankin Waddell, born in 1966 and best known under his working name Rankin, can be best described as a portrait and fashion photographer. Although Rankin has also worked on several advertorial and promotional pieces of work in his career, these would be considered his secondary photography applications with his primary applications being his fashion and portrait photography work.
Portrait Photography
Rankin is renowned for his portrait work of celebrities. His speciality is making the client feel comfortable when photographing them, therefore getting more natural shots. This has earned Rankin to gain high popularity amongst celebrities. Celebrities now want Rankin specifically to take their photographs. This is clear to see on Rankin’s website where he has a whole collection of celebrity portrait photographs that he has taken. Rankin’s photographs are taken in a controlled photography studio and the effect of the photograph would not be suitable elsewhere. Rankin uses artificial lighting on the model's instead of natural lighting allowing all the lighting of the shoot to be managed by Rankin himself.
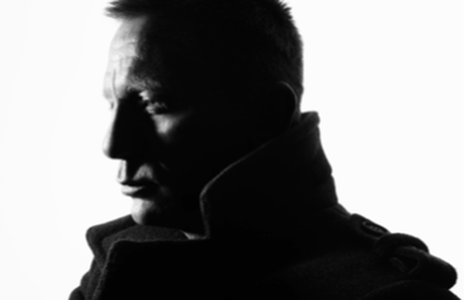
Rankin chooses to take most of his celebrity portrait photographs against solid coloured backgrounds such as white as shown in the example of Daniel Craig above. From here Rankin uses various lights and camera angles and techniques to create a stunning portrait image.
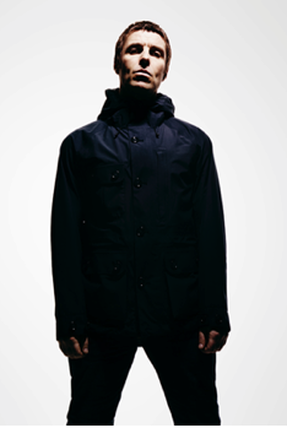
A similar technique has been used in Rankin’s photoshoot of Liam Gallagher. Once again he has been shot against a white background but to create a sense of depth in this image Rankin has perfectly positioned his lighting setup. He has shone light onto Gallagher’s face to make his face stand out while placing a light directly behind him to turn the lower part of his body almost silhouette like with the shadows he has created. In addition Rankin would have very carefully thought about his aperture settings. To achieve such a shallow depth of field Rankin will have most likely used a low F-Stop number such as f/2.8 or f/1.4 to make his aperture high.
A similar technique has been used in Rankin’s photoshoot of Liam Gallagher. Once again he has been shot against a white background but to create a sense of depth in this image Rankin has perfectly positioned his lighting setup. He has shone light onto Gallagher’s face to make his face stand out while placing a light directly behind him to turn the lower part of his body almost silhouette like with the shadows he has created. In addition Rankin would have very carefully thought about his aperture settings. To achieve such a shallow depth of field Rankin will have most likely used a low F-Stop number such as f/2.8 or f/1.4 to make his aperture high.
Fashion Photography
In addition to his high end portfolio of portrait photography work, Rankin has also made his name through his early fashion photography work.
In addition to his high end portfolio of portrait photography work, Rankin has also made his name through his early fashion photography work.
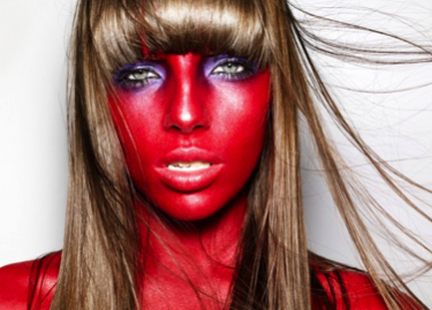
To create this photograph above Rankin's costume and make up assistants would have painted the model's top half body completely red at his request but being very careful to not touch her hair. The photograph was taken on a infinite wall so the audiences attention is completely on the model and distracted by a background. Their is no need to make the background blurry so Rankin would have used a wide depth of field to capture all the image sharp. To get the strands of hair blowing to one side, rankin would have used a fan lightly blowing her hair. To keep this hair in focus rankin would have used a reasonably fast shutter speed.
The photograph has meanings that make up can cover up a person's natural beauty, this is exaggerated as the girls entire top half is painted red. Red can also connote several things. It can connote both love and lust but also danger. The dark shading around the girls eyes makes her seem mysterious but dark and dangerous.
The photograph has meanings that make up can cover up a person's natural beauty, this is exaggerated as the girls entire top half is painted red. Red can also connote several things. It can connote both love and lust but also danger. The dark shading around the girls eyes makes her seem mysterious but dark and dangerous.
Part 3 - Martin Parr
Fine Art Photography
Martin Parr, born 23rd May 1952, is a British Fine Art and Documentary photographer. Parr is best known for his photography work that takes a satirical look on some of the aspects of modern day life, pointing out some of the ‘Uncomfortable truths’ of todays society.
Fine Art Photography
Martin Parr, born 23rd May 1952, is a British Fine Art and Documentary photographer. Parr is best known for his photography work that takes a satirical look on some of the aspects of modern day life, pointing out some of the ‘Uncomfortable truths’ of todays society.
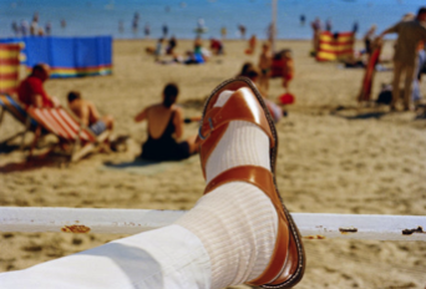
In this first photograph Parr sets the scene in the background with a semi-crowded beach with people sat with they're friends and families while others swim in the sea. However in the foreground of the image, just off centre, is a persons foot in socks and sandals. In this image we start to see Parr’s use of juxtaposition and his overrunning theme of pointing out uncomfortable truths - some of the obvious habits and natures of people that nearly no one ever takes notice of. In this case the person sat wearing socks with sandals, two items which shouldn't be worn with each other. However this juxtaposition is one of Parr’s main techniques used in his photography.
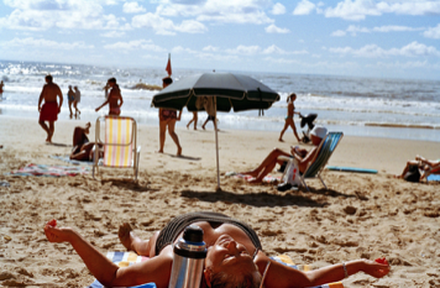
In this photo we see a woman sunbathing on the beach on a beach mat with her flask just behind her. Similar to the last photograph the background consists of more people sat on the beach with the sea and clear blue sky. Once again Parr is pointing out an uncomfortable truth with the woman stretched out on the sand. She is almost the stereotypical British holidaymaker soaking in the sun in a popular holiday destination.
Once again I feel like Parr is using juxtaposition to contrast the woman in the foreground with the people in the background of the image. From the photograph she definitely seems out of place but no one around her takes notice of this and carry on as normal with their own lives.
Once again I feel like Parr is using juxtaposition to contrast the woman in the foreground with the people in the background of the image. From the photograph she definitely seems out of place but no one around her takes notice of this and carry on as normal with their own lives.
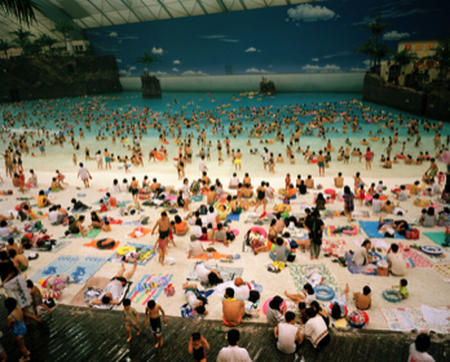
In this last photograph Parr takes things one-step further by moving us from a real beach setting to an artificial one. Here we can see hundreds of people crammed into a fake beach setting acting as though in a normal beach environment. In the foreground we can see people sitting and lying down on towels while in the background people are swimming in ‘the sea’, which is essentially just a very large pool. At the very back we can see a blue backdrop with clouds printed onto it to act as the sky. The colours in this photo are mostly bright, but in the foreground and in the background there are some dark colours which balance the photo out a bit. I think the meaning of this is to show the impact of tourism, to show how overcrowded tourism makes the beaches.
Part 4 - Ryan Brenizer
High Street Photography
Ryan Brenizer is a high street, wedding photographer from New York. Brenizer came from a photojournalistic background but soon found a passion for his high end wedding photography work. He also teaches his wedding photography and techniques in lectures and workshops around the globe, with a specialty in “what to do when everything goes wrong.” He is ranked as one of the Top 10 Wedding Photographers in the World by the two top industry magazines, American Photo and Rangefinder.
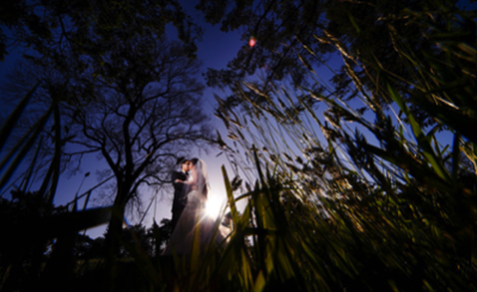
Straight away from this first example of a Brenizer wedding photograph we can start to see the unique style of this photographer. Shot low and through the grass this image encapsulates this couple with a clear blue sky behind the trees and the sunlight just visible through the smallest of gaps. Unlike some of his other images one remarkable thing about this photo is its shear naturality. For this image no studio lighting has been used, just a great mise en scene and the perfect timing of the sun behind the bride.
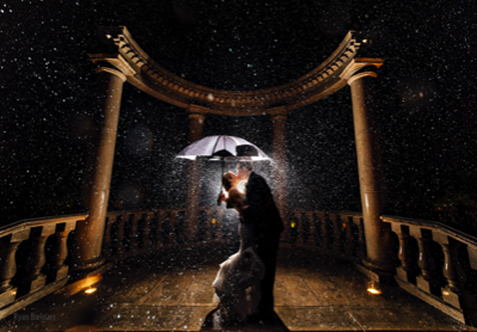
In this second image Brenizer captures another couple in another incredible setting. This time the image has been taken at night with the couple perfectly framed in the centre with an umbrella above their heads.
By using a fast shutter speed and backlighting the image behind the couple, Brenizer has also been able to capture the hundreds of light droplets of rain falling from the night sky. These are most visible towards the centre of the image near the main source of lighting but can be seen all through the image.
In this image Brenizer has contrasted the colour of the night sky against the orange he has created with the backlighting. This is most visible against the bottom and top of the two pillars on the left and right side of the image.
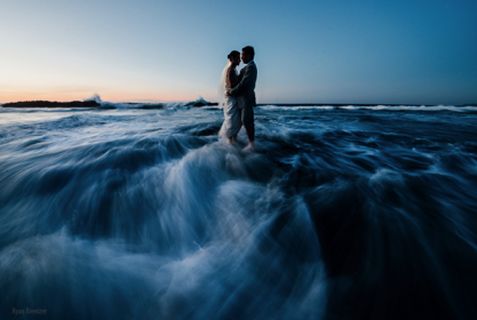
One aspect of Brenizer’s photography that specially amazes me is his impeccable choices of setting and what goes into the mise en scene of his individual photographs. This final photograph that I have chosen is a prime example of this. In this image Brenizer has captured a couple stood on a rock, centre frame with water gushing around and past them towards the camera.
In addition the water effect that Brenizer has created is truly remarkable. By using a very slow shutter speed, and by making the couple stay incredibly still, he has managed to make the moving water around them look smooth and almost silk like.
One final aspect of this image to note is the colours in the sky behind the couple. On the grooms side to the right the sky is blue matching the water below, however, on the brides side in the lower area the sky is a light orange colour. This classic colour combination of orange and teal which is just subtle in the background really does make this image eye-catching and very appealing to the viewer.
Bibliography
Part 1
https://donmccullin.com
https://en.wikipedia.org/wiki/Don_McCullin
https://www.theguardian.com/culture/2010/may/22/don-mccullin-southern-frontiers-interview
https://www.youtube.com/watch?v=n-r0IjB44KY
Part 2
http://rankin.co.uk
https://en.wikipedia.org/wiki/Rankin_(photographer)
https://www.slideshare.net/smashingentertainment/applications-of-photography-17454186
Part 3
https://www.martinparr.com
https://en.wikipedia.org/wiki/Martin_Parr
Part 4
http://ryanbrenizer.com
http://ryanbrenizer.500px.com/home
https://www.youtube.com/watch?v=lw39RecMxKo
Task 2
Digital Cameras
|
Compact Digital Cameras
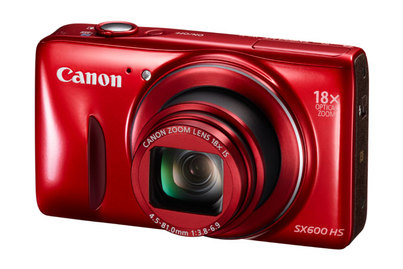
A compact digital camera (sometimes called a "point and shoot" camera) is designed to be as small and portable as possible. They are slim enough to slip into a pocket or bag, making them perfect for when you're out and about and want to get some great photos without the inconvenience of carrying a large camera around. Although they don't offer the same image quality or level of control as more advanced cameras, digital compacts are an excellent choice for people who just want to snap away with minimal fuss. |
|
|
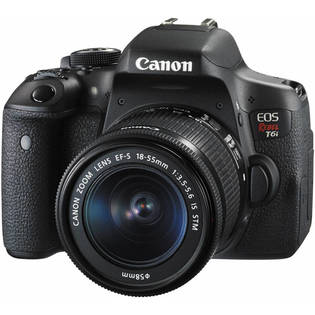
Digital SLRS
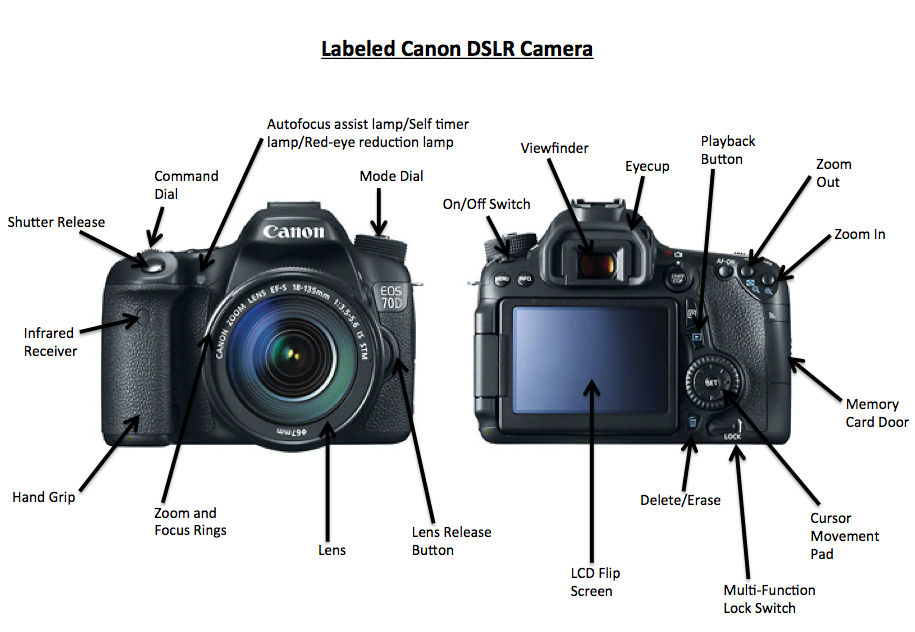
A digital SLR (or "DSLR" for short) is a more advanced type of camera which offers the ultimate in digital picture quality, greater control over camera settings, and interchangeable lenses. They work in much the same way as traditional 35mm film SLRs, but use a digital sensor rather than film, greatly reducing or even eliminating processing costs. DSLRs are the choice of professionals and serious amateurs who want the added versatility and control over settings such as aperture, shutter speed, and ISO sensitivity. As a result of this complexity they are the more expensive, larger, and heavier than compacts. |
|
|
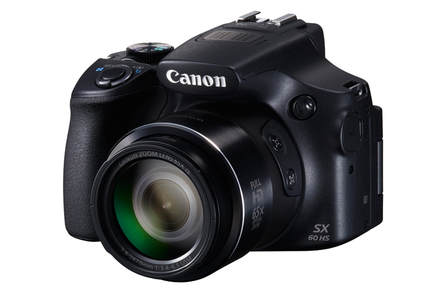
Bridge Cameras
A digital bridge camera fills the gap between point and shoot cameras and DSLRs. They are very similar in appearance to a digital SLR, but lack some important features such an optical viewfinder and interchangeable lenses. However, the majority still offer a high level of control over camera settings, much like an SLR. Bridge cameras can be a good choice for people who have reached the limits of a compact camera, but still want something which is relatively easy to operate. However, the growing number of cheap, entry-level digital SLRs is making bridge cameras increasingly redundant. |
|
|
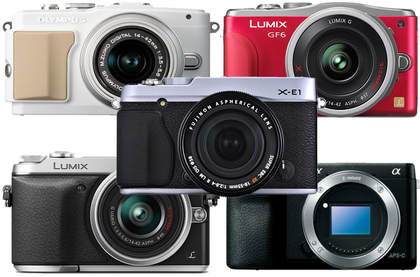
Interchangeable Lens Cameras
A recent addition to the digital camera market is the interchangeable lens camera. These fill the same gap as bridge cameras, offering something in between a point and shoot and a digital SLR. However, they offer something very different, with small, compact-like bodies and interchangeable SLR-like lenses rather the bridge cameras' large, SLR-like bodies and fixed lenses. Interchangeable lens cameras offer an excellent alternative to entry-level DSLRs, with similar picture quality but much smaller bodies. |
|
|
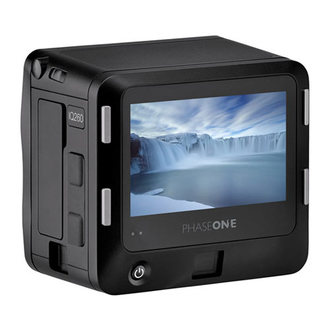
Digital Backs
A digital back is a piece of equipment that contains a digital sensor, and attaches to the back of a film camera to give it digital capabilities. They are used on cameras which don't have a digital equivalent, or where there are very few digital models available, such as medium-format and large-format cameras. Digital backs are very specialist pieces of equipment, and most photographers won't need to use them, but they are very popular in certain types of photography. They also tend to be very expensive, costing several thousand pounds. |
|
Lenses
|
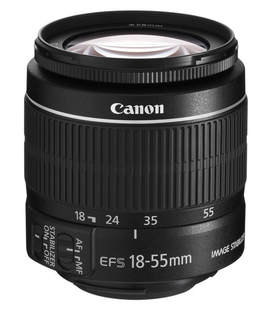
Kit Lenses
Many entry-level SLRs come bundled with one or two lenses, often called "starter" or "kit" lenses. These are good for getting up and running quickly but they are generally very cheap, slow lenses with poor image quality. A kit lens is great for getting to grips with cameras and figuring out preferred focal lengths but should be replaced for a more professional lens as soon as possible to the user. |
|
|
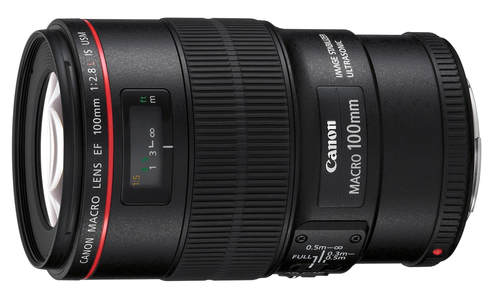
Macro Lenses
A macro lens is one designed especially for close-up photography. They have a different internal construction from normal lenses which gives them very good sharpness and contrast, meaning that they produce some really eye-catching photos. Macro lenses are useful for photographing any subject at very close range. Typical subjects include insects, animals, and plants, but they are also popular for taking extremely detailed photos of everyday objects. |
|
|
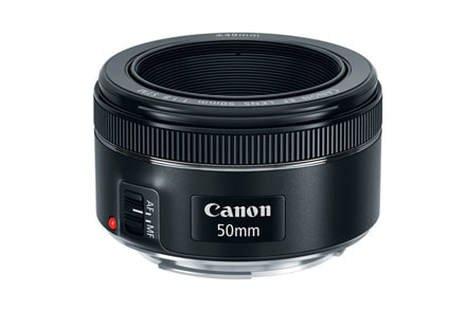
Standard Lenses
A standard lens is one with a mid-range focal length, typically around 50mm. They have an angle of view which is roughly the same as the angle that the human eye can comfortably view, meaning that they produce images which appear "natural" to the viewer. Standard camera lenses usually have a fixed focal length and wide aperture, giving them excellent performance in low light. They are popular for a wide range of photography subjects, including landscapes, portraits, and candid shots. |
|
|
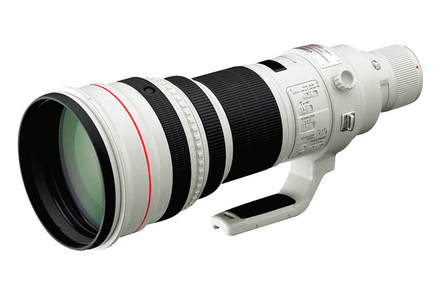
Telephoto Lenses
A telephoto lens has a long focal length and provides a high level of magnification, allowing subjects to be photographed at a moderate to far distance. They tend to be bigger and heavier than other types of lens, although modern technological advances have made them more compact and easier to handle. Telephoto lenses are popular for any type of photography where you can't get near to the subject, including wildlife and sports events. They are also commonly used in portrait photography, where a moderate telephoto lens will provide a natural, undistorted perspective. |
|
|
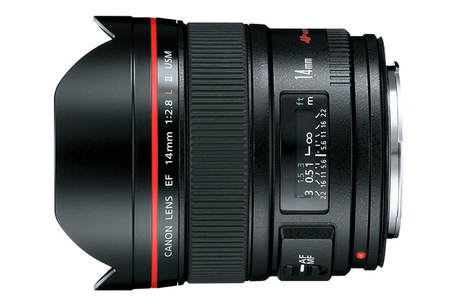
Wide Angle Lenses
A wide angle lens is one with a short focal length. They provide an angle of view beyond that of a standard lens, allowing them to capture more of the scene in a single shot. Extreme wide angle lenses are known as fisheye lens; these can capture around 180 degrees, making for some intriguing, almost abstract photos. Wide angle lenses are useful for photographing landscapes, cramped interiors, and other subjects which won't fit into a normal lens's field of view. Fisheye lenses take this even further, and are popular for photographing action sports like skateboarding and surfing, where their inherent distortion gives photos a dynamic feel. |
|
Primes and Zooms
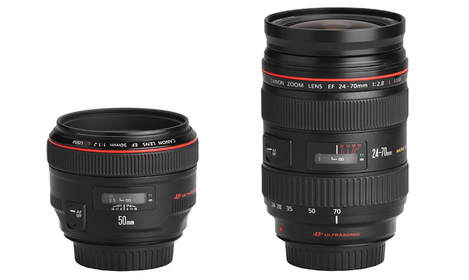
A "prime" lens is one with a fixed focal length, while a "zoom" lens is one that can zoomed in and out to provide a wider range of focal lengths. Each type has its own benefits and drawbacks.
Prime lenses tend to have better optical quality than zooms, and can usually achieve a wider aperture, giving them better low-light performance. Their lack of moving parts also makes them lighter and cheaper. On the other hand, the range of focal lengths offered by a zoom lens can provide more flexibility, making them suitable for a wider range of subjects.
The choice between prime and zoom depends on the users level of experience and the subjects that they intend to photograph. For a beginner, a zoom lens can be a better choice as it will allow experimentation with a wide range of focal lengths. For more experienced photographers, the improved quality of a prime lens will usually more than make up for the reduced flexibility.
Tripods
|
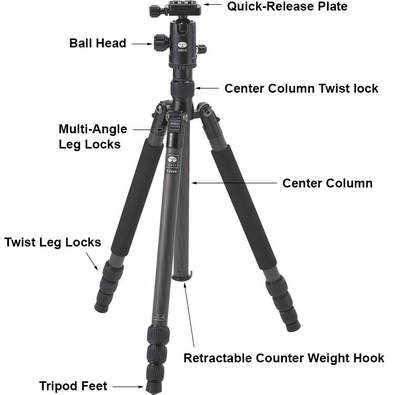
What is a Tripod?
The primary purpose of the tripod is to hold a camera completely steady—zero movement and vibration; however, the tripod is very, very far from a one-size-fits-all-photographic accessory. And, although they all look about the same, there are many brands, styles, and variations. Some differences are centered on personal preference such as color; others are more purpose-driven. Almost all tripods can be broken down into basic components. In the diagram to the right I have labeled the different parts of the tripod. Almost every part comes in different shapes, sizes, and materials. All the parts perform basically the same job, and the overall goal of the tripod is stability for the camera. |
|
How to set up a Tripod
Memory Cards
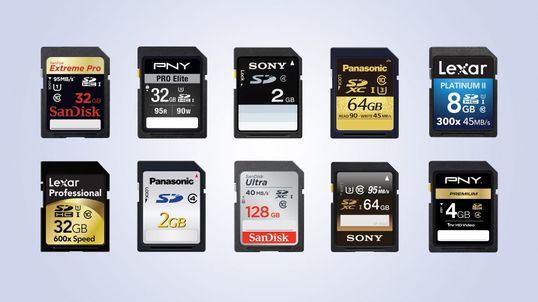
The vast majority of cameras use SD-format memory cards for recording images and videos. Over the years these have evolved to meet the demands of increasingly advanced cameras, from the higher megapixel counts of sensors to faster bursts rates and 4K video recording. A consequence of this is that today’s cards bear many different indicators as to how they can be expected to perform.
|
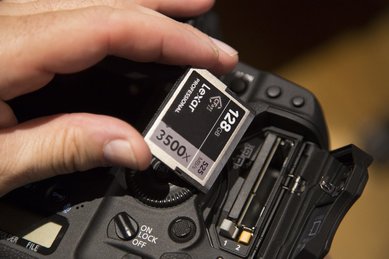
Type and Brand
The first thing to look for is whether a specific card is compatible with the camera being used. Assuming the camera uses the SD format, it should be compatible with the two main types of cards manufactured today, namely SDHC (Secure Digital High Capacity) and SDXC (Secure Digital eXtended Capacity). Older cards that are simply marked SD will typically work with today’s cameras too, although they're no longer produced, as the demands of the latest models exceed their capabilities. Other types of SD cards come in smaller variants, such as microSDXC. These are typically used in smartphones, although they often come with SD-sized adapters that allow them to be used in cameras and card readers. Lexar and Sandisk are the dominant players in the market, although Integral, Kingston and Transcend produce alternatives that may be cheaper, while there are also options from well-known brands such as Toshiba and Samsung. |
|
Capacity
Memory cards come in a wide range of capacities, and this is reflected in their price. All cards with a capacity of 32GB and under fall into the SDHC camp, while cards sized at 64GB and over are classed as SDXC. The most common types of cards are 16GB, 32GB and 64GB.
How large a card you need depends on the intended use for it. Someone using a compact camera with a 12MP sensor, for example, should get along fine with a 16GB card if they only intend to capture JPEGs on an occasional basis. If the camera is equipped with a larger sensor, however, and the user wants to capture raw files, videos or many bursts of images, you're likely to find that a 16GB card fills up far too quickly.
Most people find that opting for a handful of moderately sized cards is a better option than using a single larger one. This makes sense from the perspective of security – if something goes wrong with the card, for example, it’s good to know that not all your images and videos are at risk – but it’s also a good idea where organisation is concerned. An increasing number of cameras now offer two card slots, which is another reason to invest in multiple cards rather than just one.
|
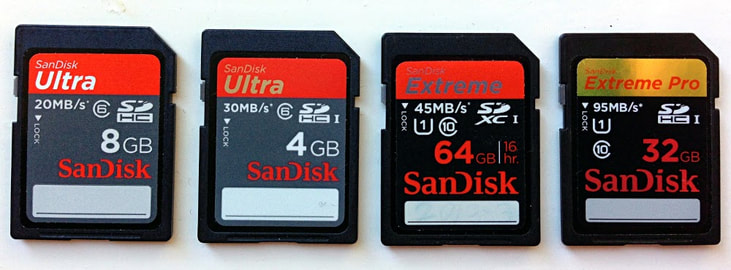
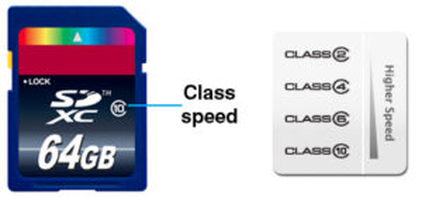
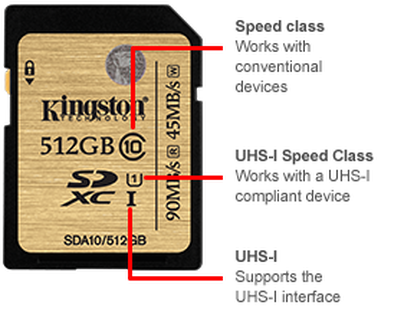
Speed and Performance Many of the markings on a memory card relate to its performance in terms of transfer speeds. We’ll take a look at each of these in turn: 1. Speed Class Many of today’s SDHC and SDXC cards are marked with a figure such as 2, 4 6 or 10 in an almost complete circle, and this indicates the minimum sustained write speed for that card. This is known as the Speed Class and it’s a useful way to assess whether a card is suitable for the users individual video work. The figures themselves are derived from the measurement in MB/s. So a Class 2 card has a minimum sustained write speed of 2MB/s, while a Class 4 card ups this to 4MB/s and so on. As a general rule the faster the better. Class 10 cards are ideal for Full HD video but if the camera supports 4K video recording a card that also shows its UHS Class would be more suitable. 2. UHS Class SDHC and SDXC cards typically show the number 1 or 3 inside a U shaped icon. Where this is shown, the card conforms to the newer Ultra High Speed (UHS) standard. Like Card Class, this provides an idea of a minimum guaranteed sustained write speed. Trying to record high resolution video to slow cards can cause the camera to stop recording, potentially even after just a few seconds. |
|
The Exposure Triangle
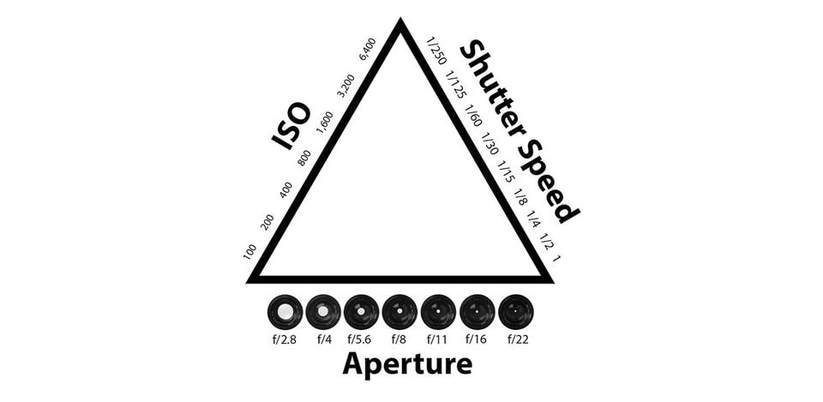
Aperture, shutter speed, and ISO make up the three sides of the exposure triangle. They work together to gather the amount of light needed for a correctly exposed photograph. If one variable changes, at least one of the others must also change to maintain the correct exposure.
|
Aperture
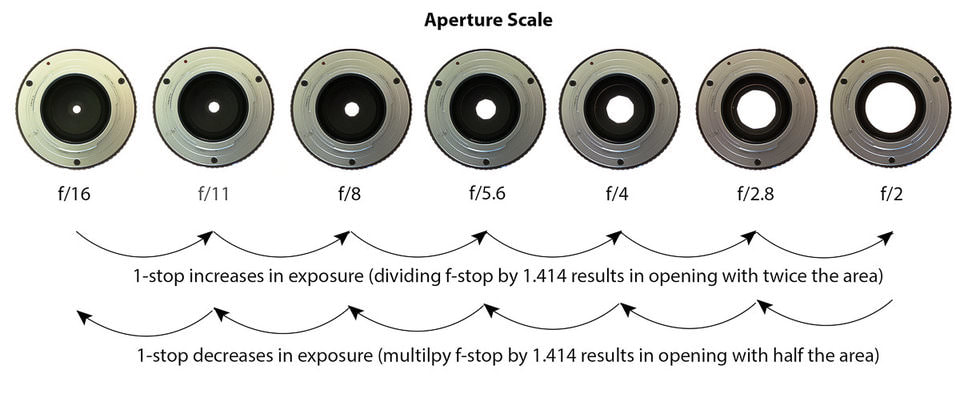
The aperture is all about controlling the amount of light that gets to the digital sensor of a camera. The aperture is the opening found in a camera lens. If you look closely at the camera lens, you will find round or ring-like metal blades. These blades open and close: it opens to widen the opening, and it closes if you want the opening to narrow down. As such, controlling the aperture or choosing to use the Aperture Priority mode allows you to adjust the amount of light that can get into your camera so that it can either open (widen) or close (narrow). The aperture setting is determined by several f-stop values. The usual numerical values for the f-stop are 1.4, 1.8, 2.0., 2.8, 3.6, 4, 5.6, 8, 11, 16 and 22. When you adjust the aperture, note that as the numerical value increases, the aperture becomes smaller and the amount of light that gets through decreases. Also, the smaller the aperture size, the wider your depth of field — a deeper portion of your photo will be in focus. For shallow depth of field photos, use a larger aperture size. When you adjust the aperture by just one stop, you either halve or double the amount of light that goes through the camera lens. |
|
|
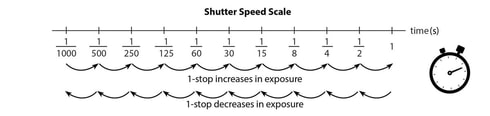
Shutter Speed
Shutter speed is the length of time light is allowed to hit the sensor. It is measured in seconds. Shutter speed is probably the easiest of the exposure triangle sides to understand. To double the amount of light, we need to double the length of the exposure. For example, moving from a shutter speed of 1⁄60 s to 1⁄30 s will add a stop of light because the shutter will remain open twice as long. Changing from a shutter speed of 1s to 1/8 s will decrease the exposure by three stops. Why? From 1s to 1⁄2 s is one stop. Then 1⁄2 s to 1⁄4 s is another stop. Finally, 1⁄4 s to 1⁄8s is a further halving of the time the shutter remains open or the third stop. |
|
|
ISO
The final variable in the exposure triangle is ISO. You can think of ISO as the sensitivity of the digital sensor. Higher values of ISO mean that the sensor does not need to collect as much light to make a correct exposure. Low ISO values mean that the sensor will have to gather more light to make the exposure. To the right is the ISO scale. Like shutter speed, this scale is easy to understand. Doubling the ISO equates to a one stop increase in exposure. Halving the ISO leads to a reduction of the exposure by one stop. |

|
Combining the ISO, aperture and shutter speed results in an equivalent exposure value for a particular setting. If any one of these elements is adjusted, the resulting image will not be the same. If you increase the f-stop to decrease the amount of light getting to the sensor, you will also need to adjust the shutter speed and the ISO for an equivalent exposure; otherwise, images might come out blurry or too bright; overexposed or underexposed.
Macro Photography
What is Macro Photography?
The term "macro photography" is often used to describe any close-up shot. However, in DSLR photography it should really only be used to describe a photograph with a 1:1 or higher magnification. Macro capable photography lenses are marked with magnification ratios such as 1:1 or 1:5. A 1:1 ratio means that the image would be the same size on film as in real life. A 1:5 ratio would mean that the subject would be 1/5 the size on film as it is in real life. Macro photography is commonly used by still life DSLR photographers to capture small details of objects. You will also see it used to photograph flowers, insects, and jewellery, among other items.
How to Shoot a Macro Photograph
There are a number of ways to shoot macro photographs. Each have their own advantages and disadvantages:
1. Macro Lens
If you own a DSLR camera, the easiest way to achieve macro shots is to buy a designated macro lens. Typically, macro lenses come in either a 60mm or 100mm focal length. However, they are not cheap, costing anywhere from £500 to several thousand pounds. They will obviously give the best and sharpest results, but there are a couple of alternatives.
2. Close-Up Filters
The cheapest way to get macro shots is to buy a close-up filter to screw onto the front of the camera lens. They are designed to allow closer focus and they come in various strengths.
Close-up filters are often sold in sets as well though it is best to use only one at a time. Too many filters can deteriorate the image quality because the light has to travel through more pieces of glass. Also autofocus does not always work with close-up filters, therefore it is far easier to shoot macro photographer in manual mode.
While the quality will not be as good as with a dedicated macro lens, you will still achieve usable shots.
3. Macro Mode
Users of compact and point an shoot cameras can also take macro photographs as most of these cameras have a macro mode setting already on them. In fact, it can be far easier to achieve a 1:1 magnification with compact cameras, because of their built-in zoom lenses.
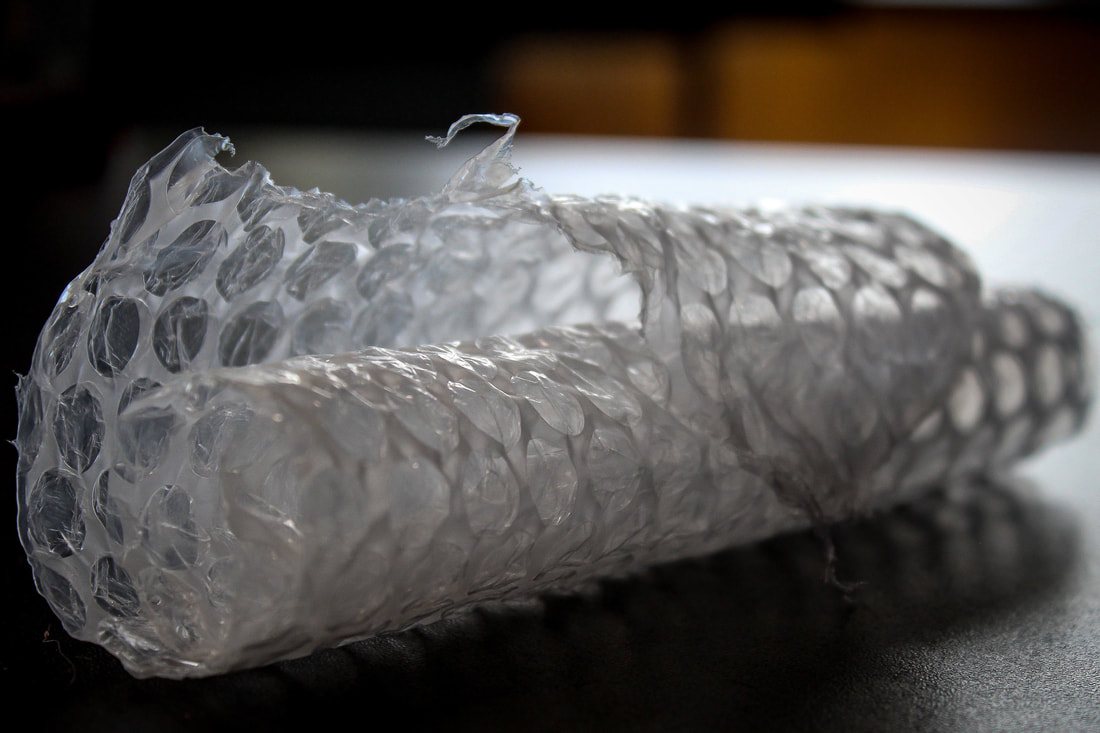
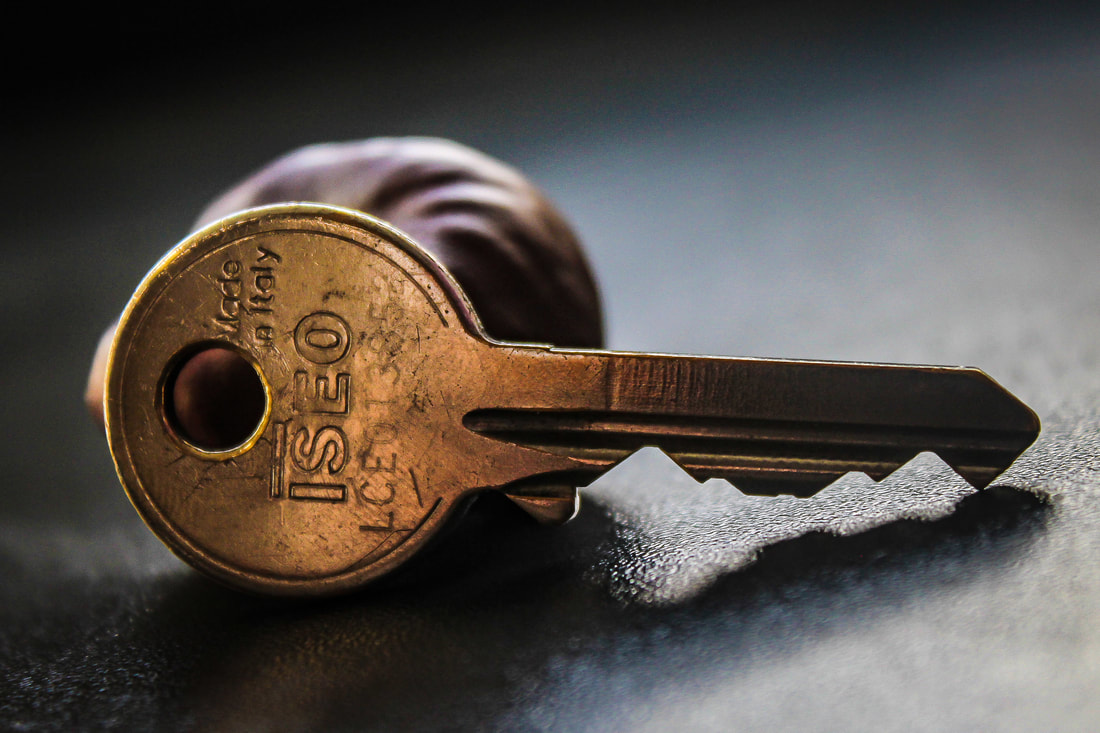
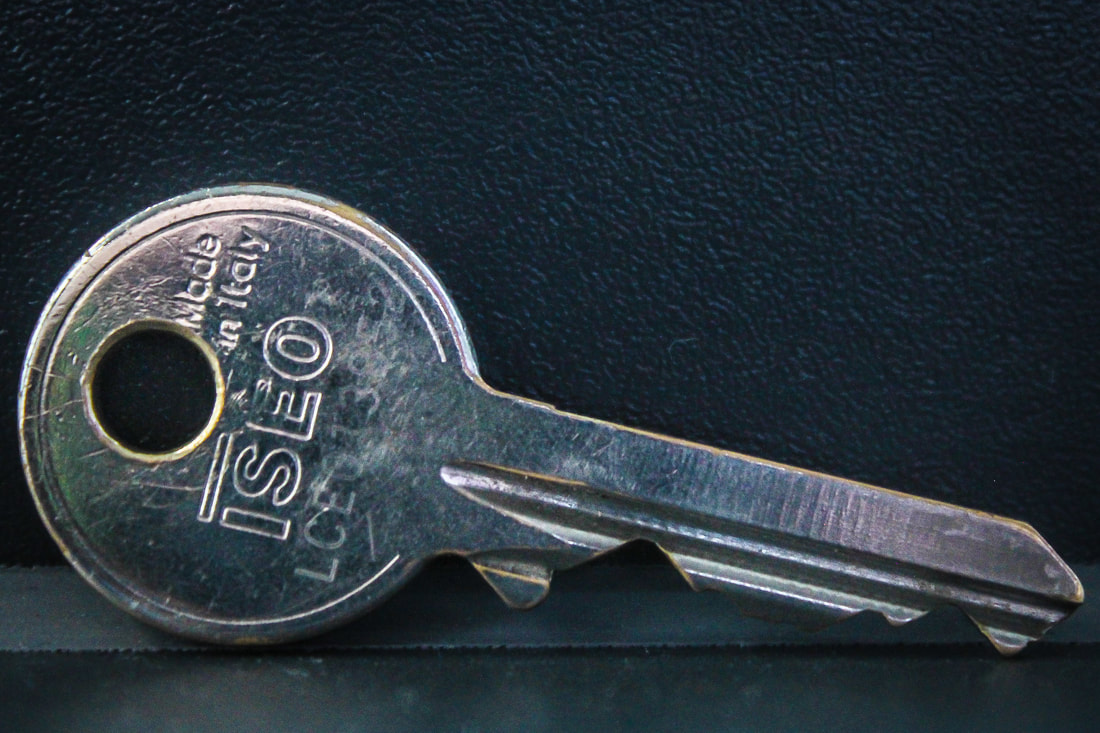
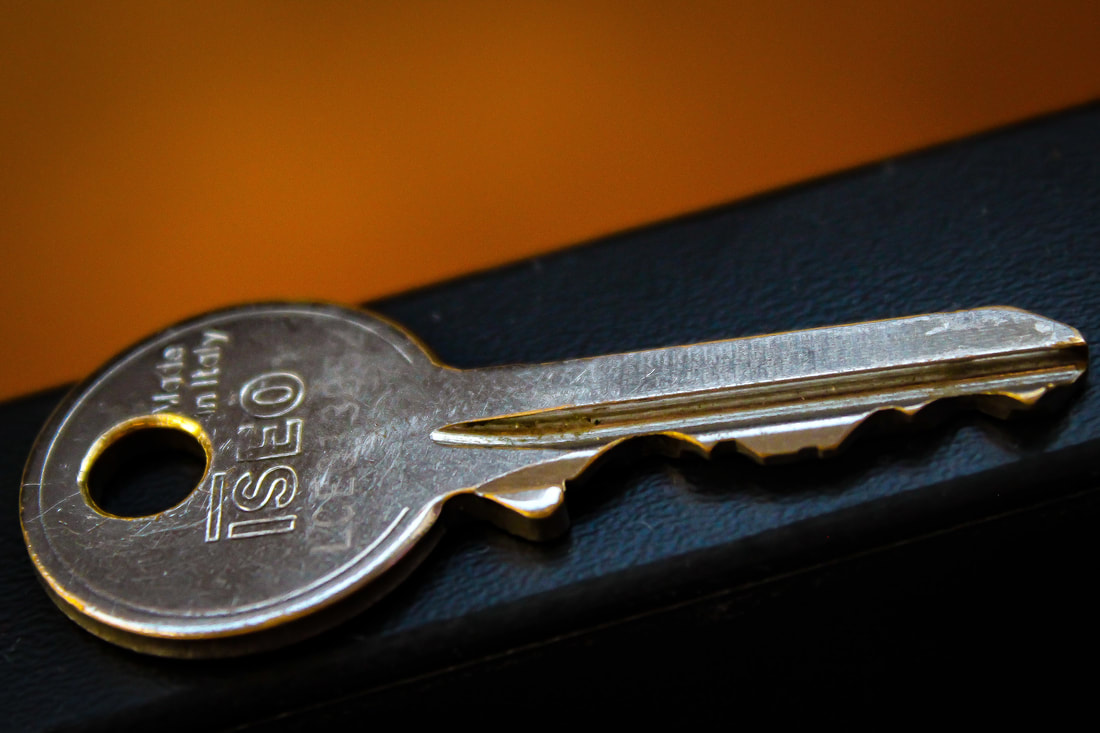
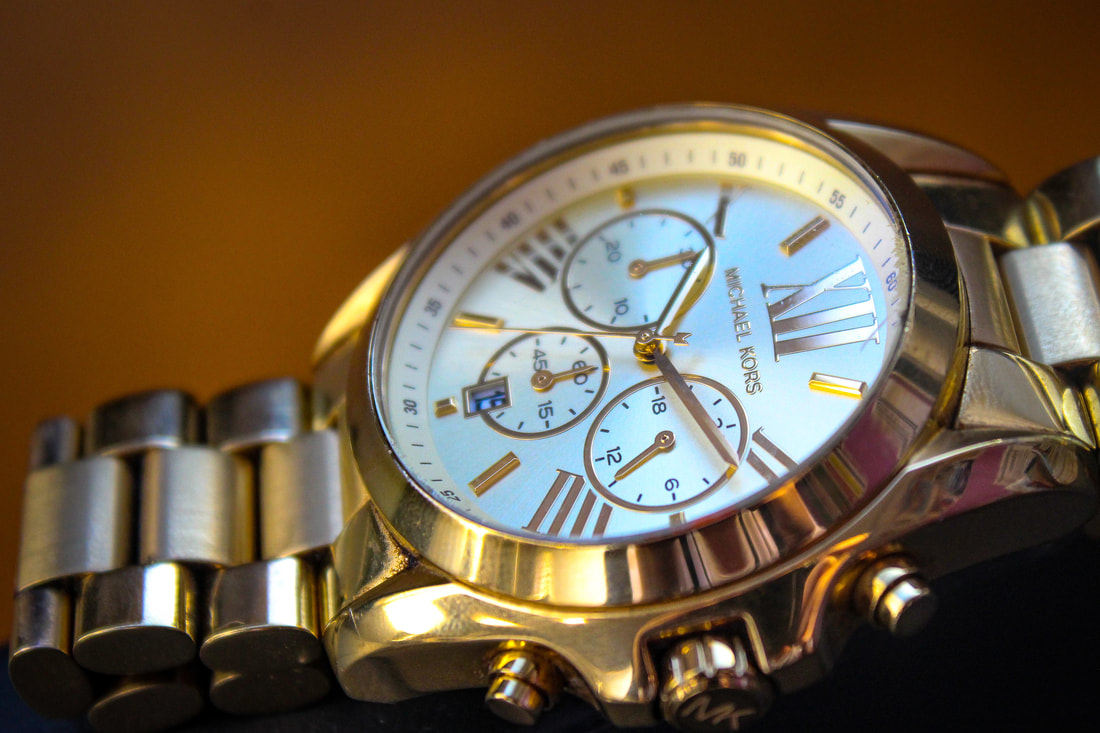
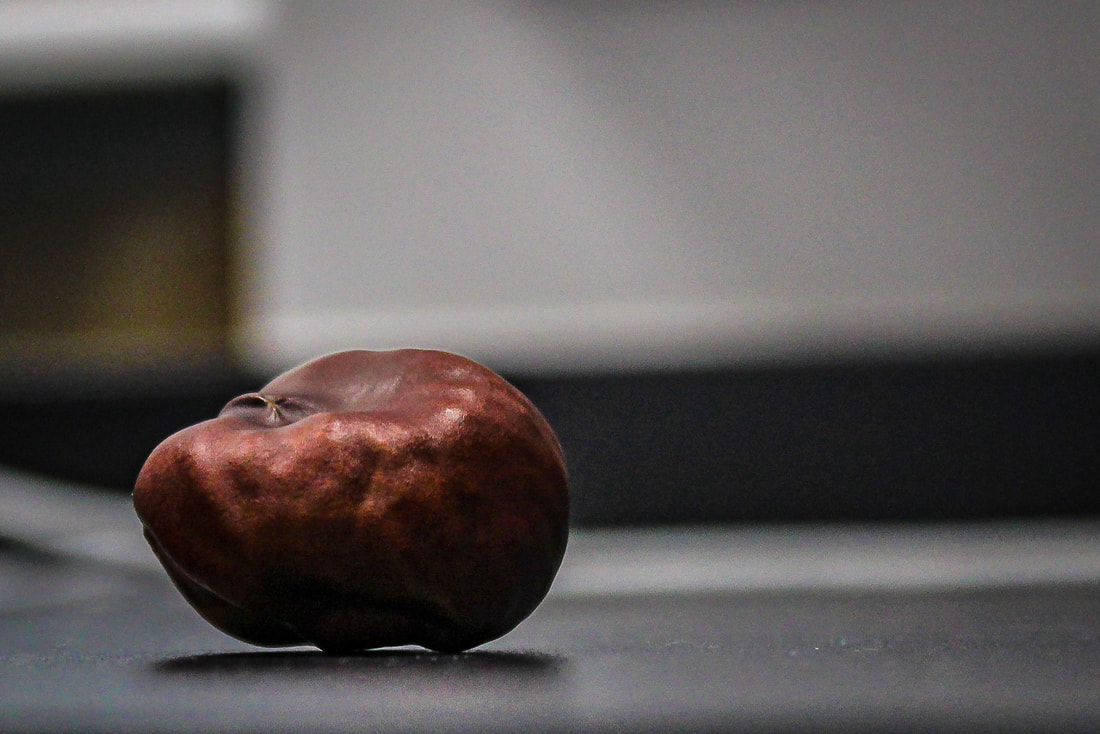
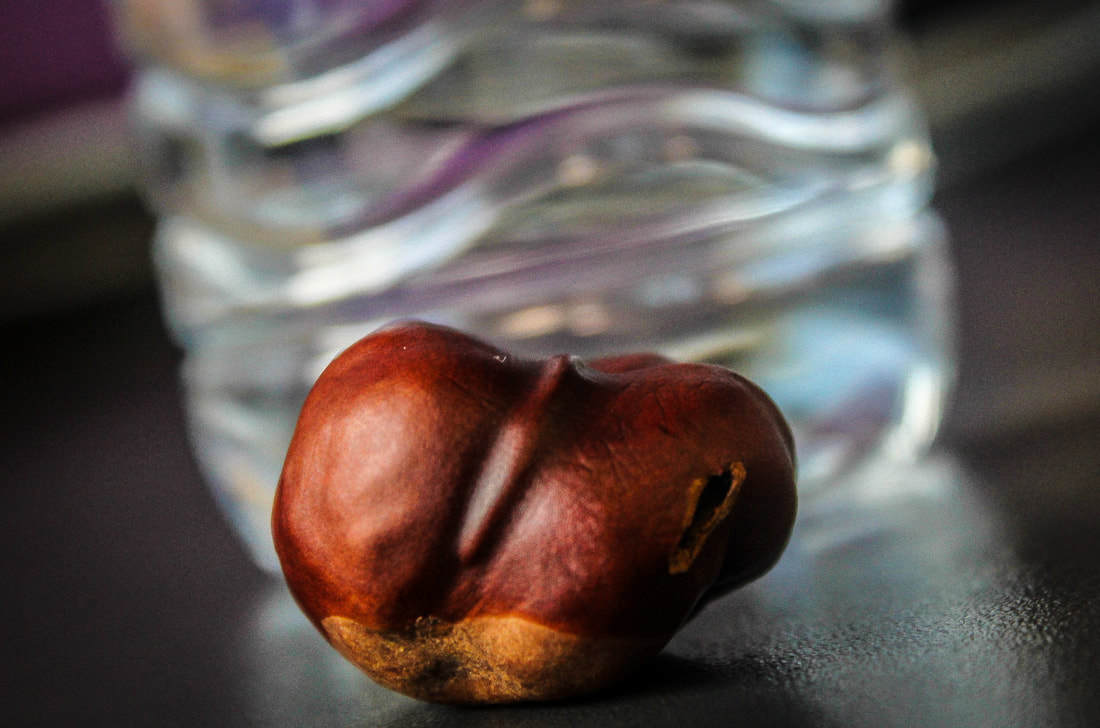
Here I experimented with some macro photography of my own. I managed to get some great looking, close up images of items such as a watch, some bubble wrap, a key and a conker:


Long Exposure
What is a Long Exposure Photograph?
Long exposure photography is when a photographer uses a very slow shutter speed, and it’s usually used as a specific technique to achieve a certain effect. However there’s no defined transition point at which a shutter speed becomes slow enough to define someones shooting as ‘long exposure photography’.
These kind of long exposure times are often used to blur something in a photo, for example running water in stream, or the movement of stars across the night sky. A long exposure helps us to trace the pattern of time and render things in a different way to how we are used to seeing them. When we see things differently, it naturally fascinates us and that’s a significant factor in creating a compelling image.
In order to achieve long exposures during the daytime, it’s often necessary to use neutral density filters on a lens, which cuts down the light entering the lens. With less light entering the lens, the shutter speed needs to be much longer to achieve the same exposure. Neutral density filters can allow you to shoot exposures of several minutes long, even in bright daytime situations.
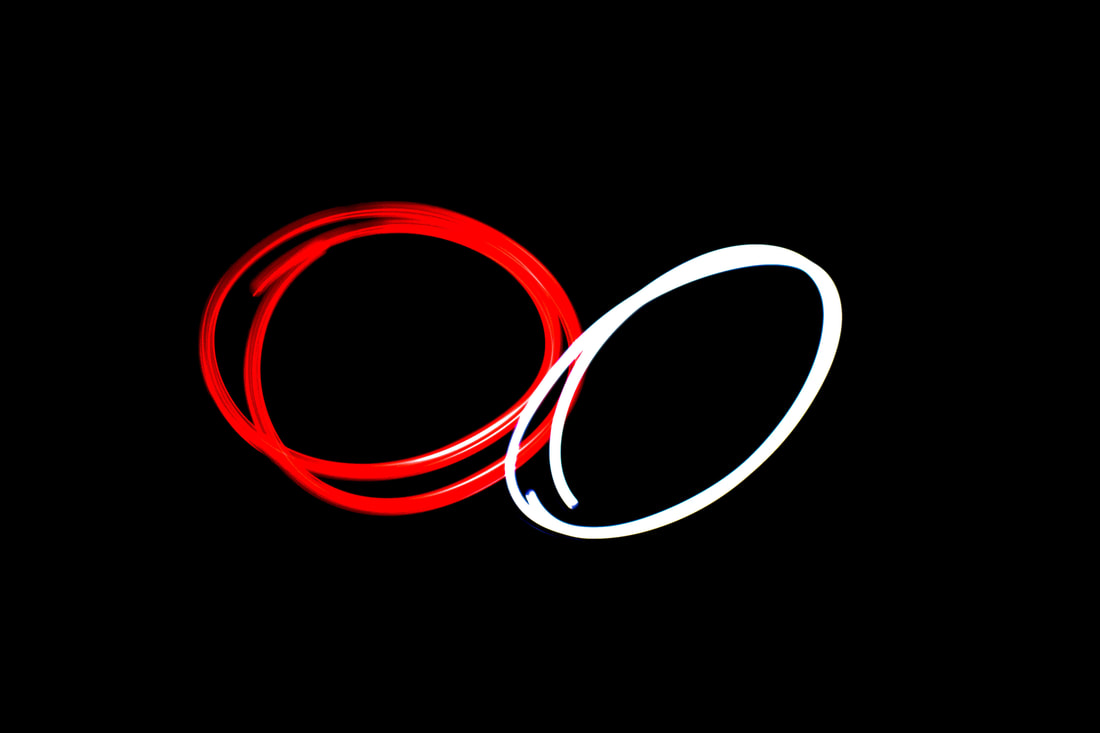
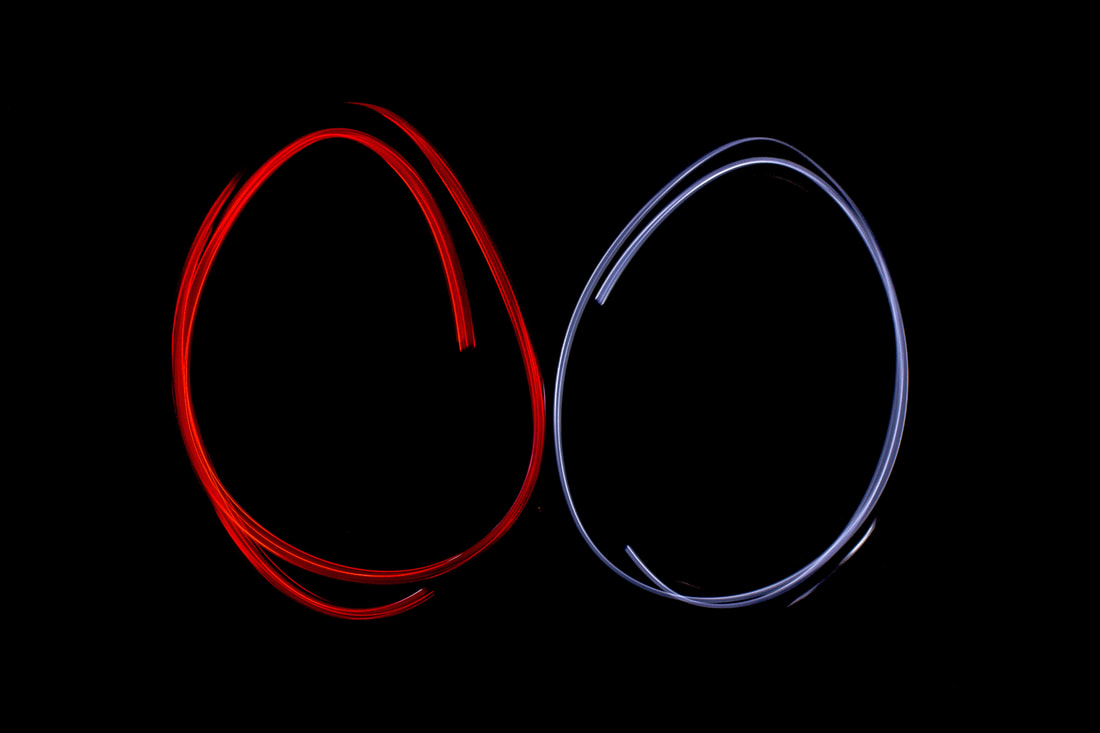
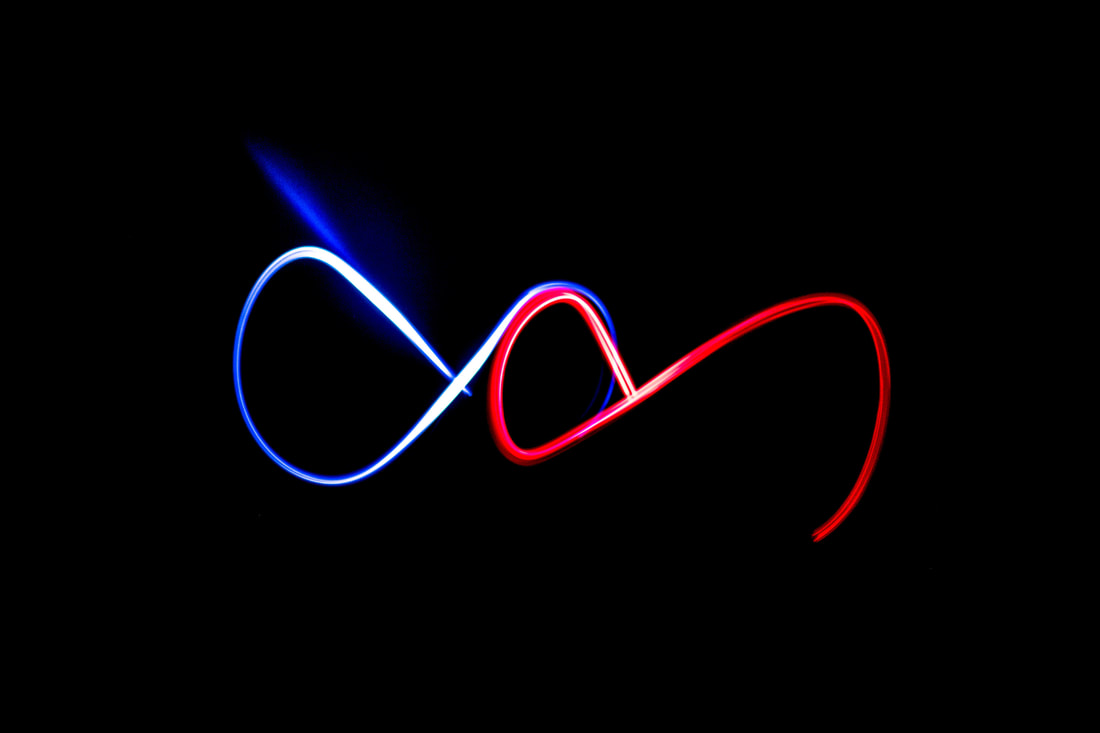
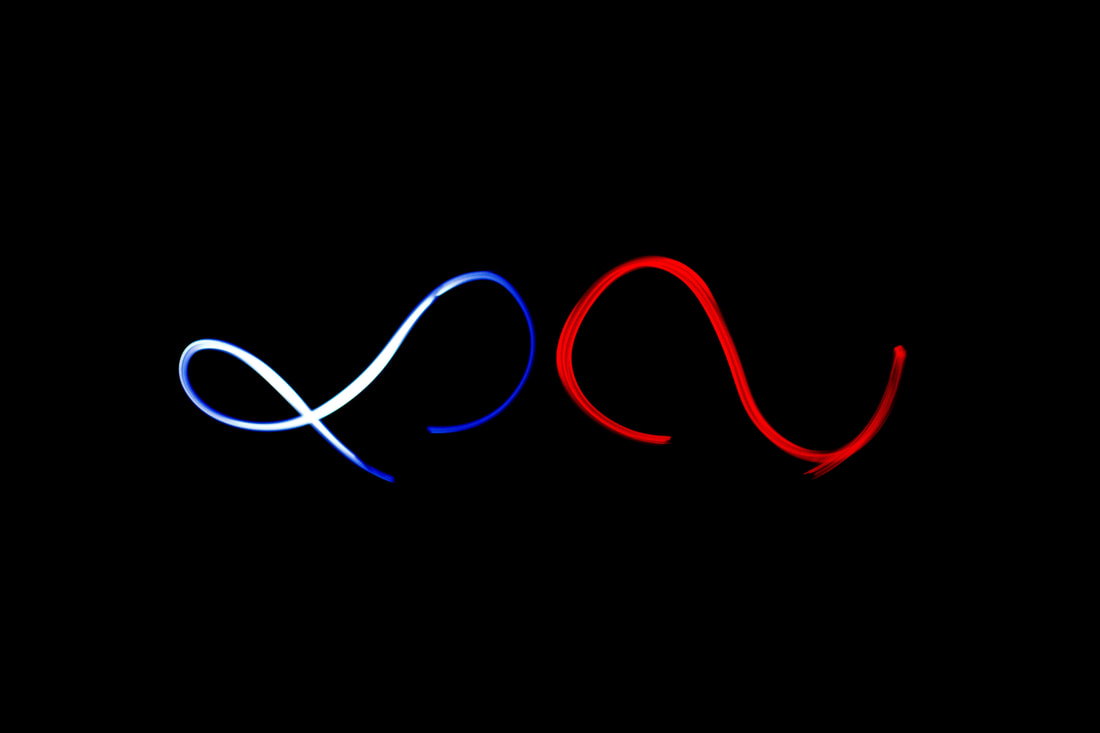
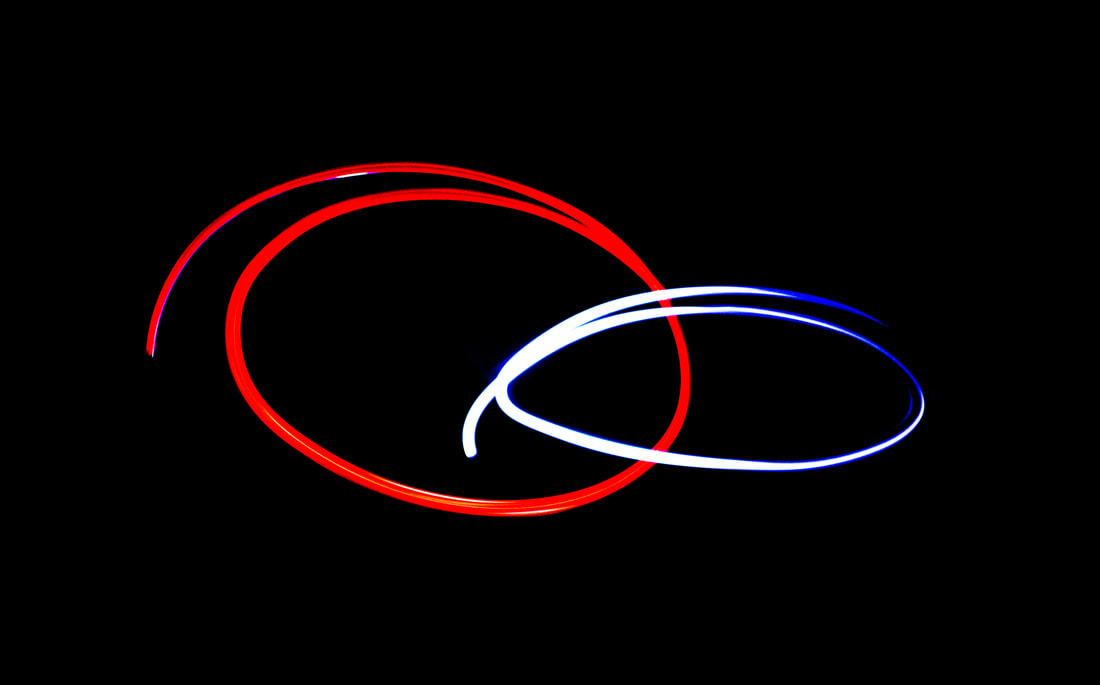
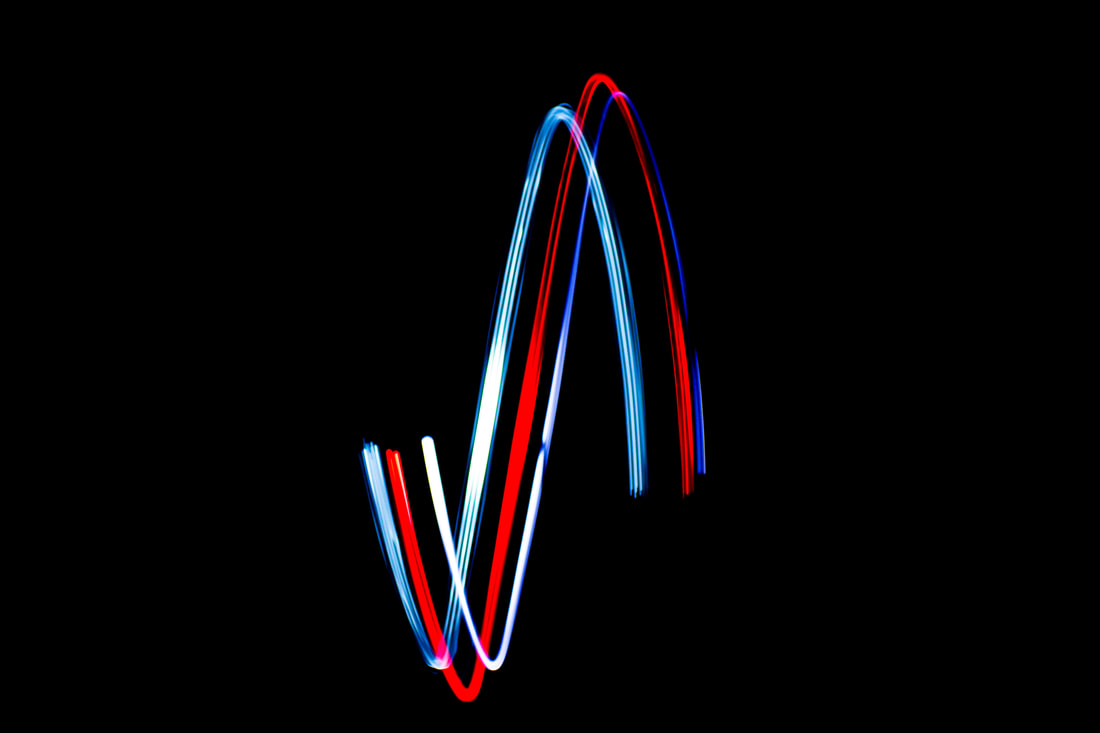
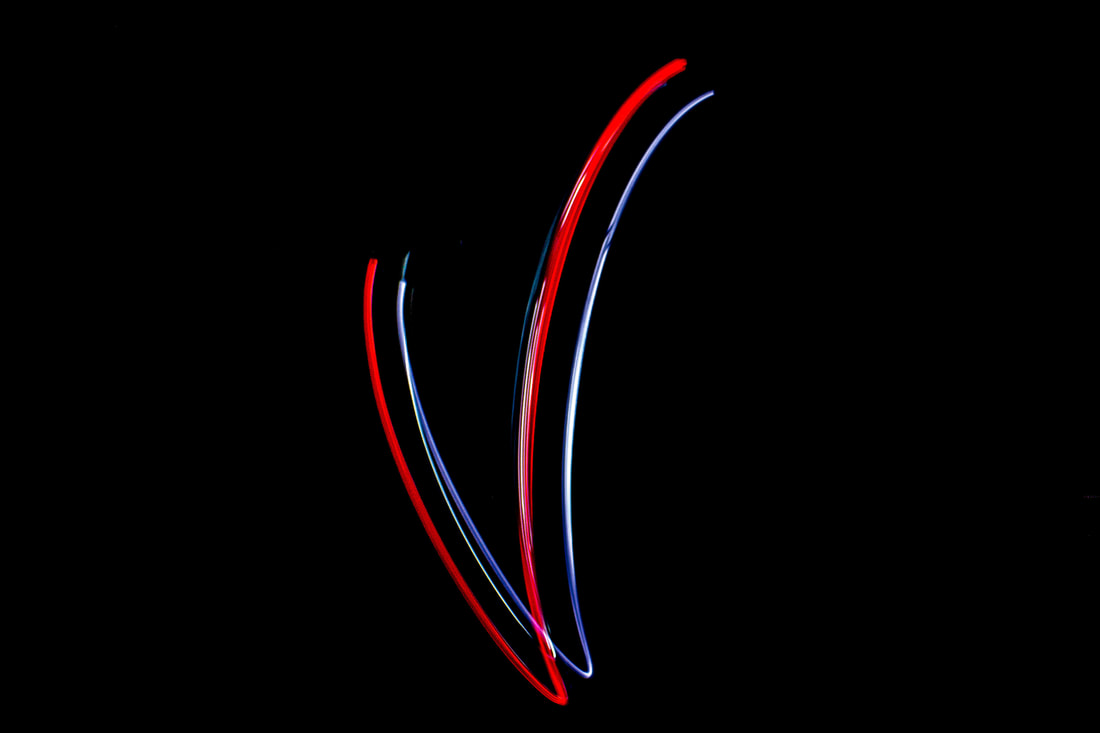
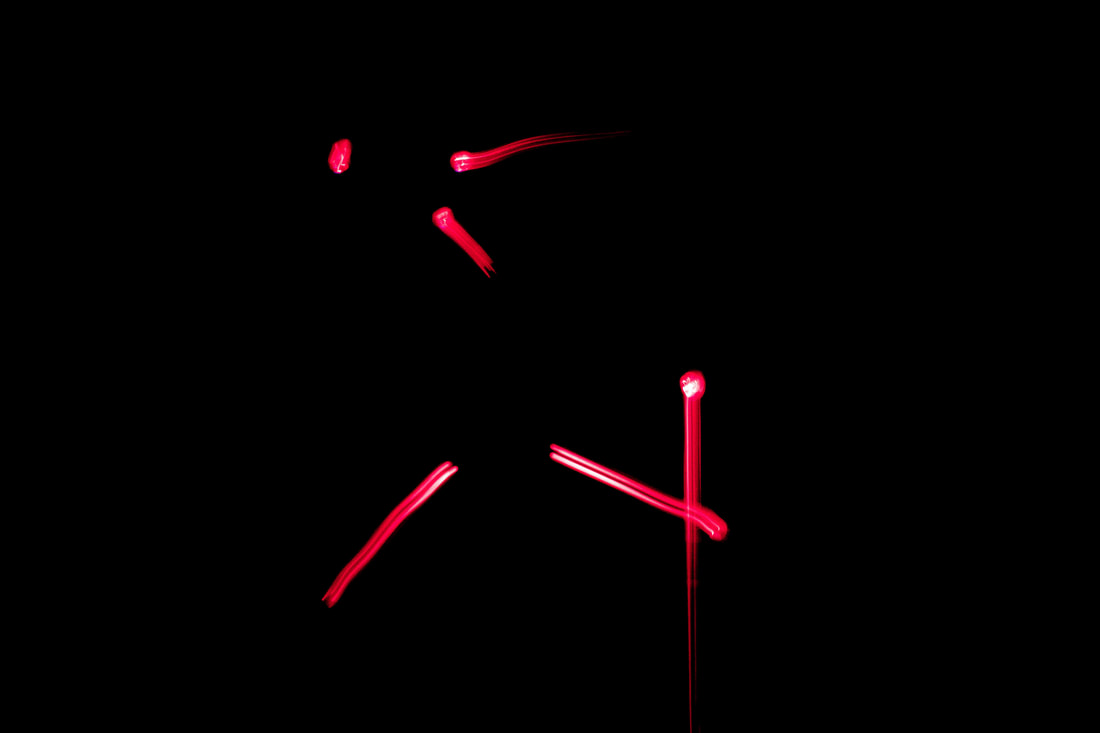
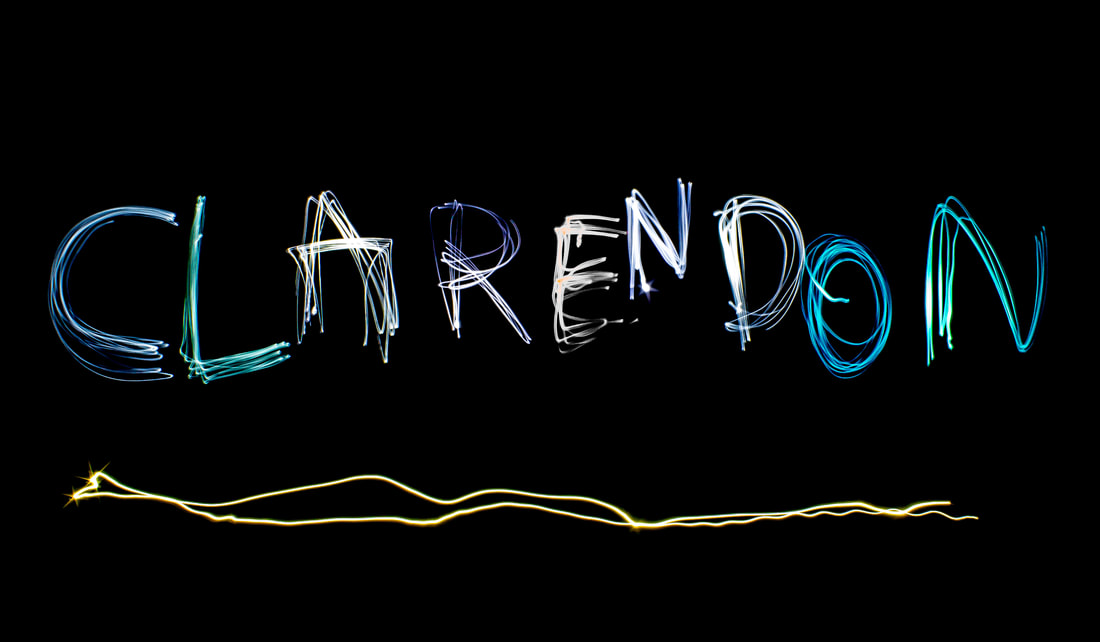
Lightpainting
Light Painting is one example of photography that uses a long exposure to create it's effect. In light painting exposures are made by moving a hand-held light source while taking a long exposure photograph, either to illuminate a subject or to shine a point of light directly at the camera, or by moving the camera itself during exposure. The technique is used for artistic purposes, as well as in commercial photography. Light painting has long inspired photographers with the technique, capturing a moving light source whilst taking a long exposure photograph which is difficult to perfect but can produce some amazing results.
In the gallery below I had a go at some of my own light painting photography:
Long exposure photography is when a photographer uses a very slow shutter speed, and it’s usually used as a specific technique to achieve a certain effect. However there’s no defined transition point at which a shutter speed becomes slow enough to define someones shooting as ‘long exposure photography’.
These kind of long exposure times are often used to blur something in a photo, for example running water in stream, or the movement of stars across the night sky. A long exposure helps us to trace the pattern of time and render things in a different way to how we are used to seeing them. When we see things differently, it naturally fascinates us and that’s a significant factor in creating a compelling image.
In order to achieve long exposures during the daytime, it’s often necessary to use neutral density filters on a lens, which cuts down the light entering the lens. With less light entering the lens, the shutter speed needs to be much longer to achieve the same exposure. Neutral density filters can allow you to shoot exposures of several minutes long, even in bright daytime situations.
Lightpainting
Light Painting is one example of photography that uses a long exposure to create it's effect. In light painting exposures are made by moving a hand-held light source while taking a long exposure photograph, either to illuminate a subject or to shine a point of light directly at the camera, or by moving the camera itself during exposure. The technique is used for artistic purposes, as well as in commercial photography. Light painting has long inspired photographers with the technique, capturing a moving light source whilst taking a long exposure photograph which is difficult to perfect but can produce some amazing results.
In the gallery below I had a go at some of my own light painting photography:
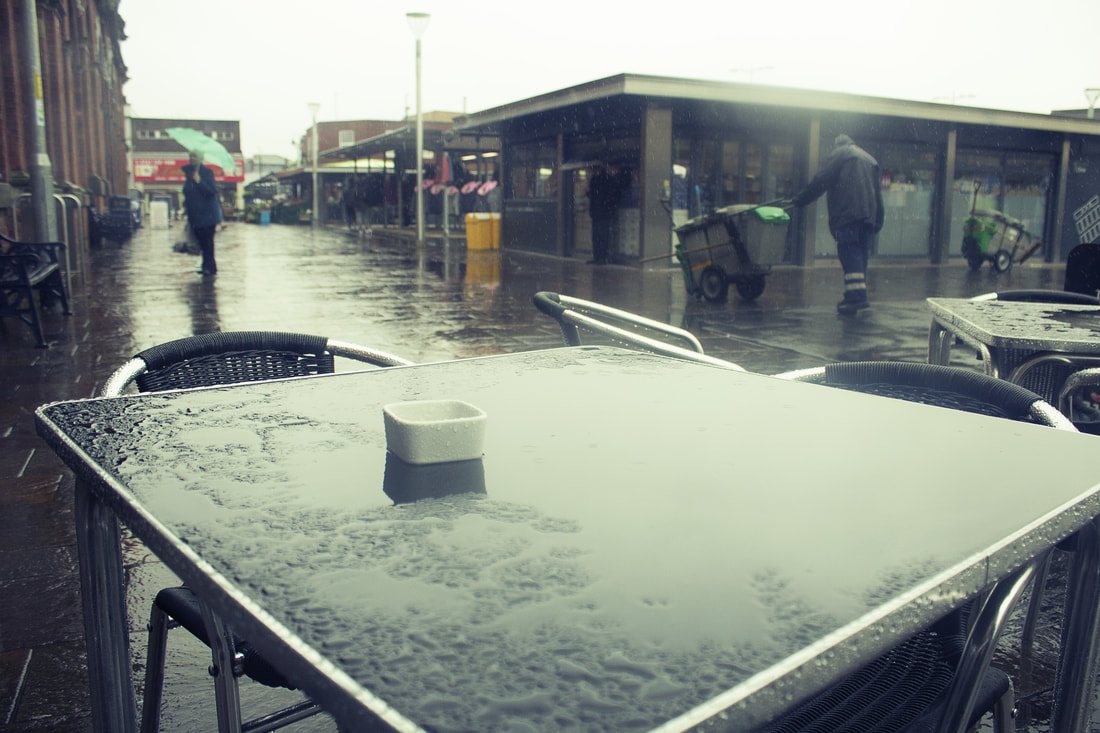
Lomo Effect
The “Lomography” photo effect (Lomo) is a popular photographic style characterised by oversaturated colours, distortions, and several other qualities that are usually avoided or corrected by traditional photographers. Those who enjoy and seek these unusual effects appreciate lomography’s stylized surrealism.
The effect is inspired by photographs taken from an inexpensive Russian camera called the Lomo LC-A. The photos produced by Lomo carry high-contrast, increased saturation, and unique coloring due to “improper” colour reproduction and dark blurry edges with a sharp centre. These unusual features add to the distinctiveness of lomography and raised the demand for creative photos.
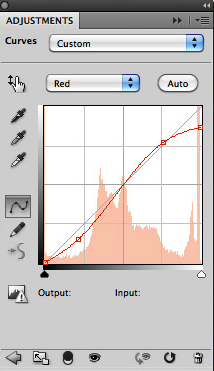
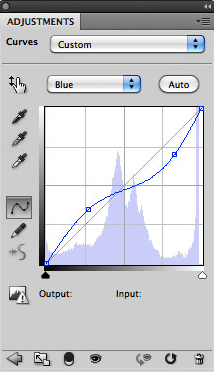
The Lomo Effect can be added to any photograph by simply opening the image in photoshop and changing the RGB curves. For the images I edited in the gallery below I selected and changed the red, green and blue curves individually. For the red and green layers I dropped the shadows and raised the highlights and then pushed the shadows and dropped the highlights on the blue curve adjustment to create my effect.
From here I pulled the images through into Lightroom and added a very slight vignette to the images to slightly blur the borders and sharpen the centres.
The effect is inspired by photographs taken from an inexpensive Russian camera called the Lomo LC-A. The photos produced by Lomo carry high-contrast, increased saturation, and unique coloring due to “improper” colour reproduction and dark blurry edges with a sharp centre. These unusual features add to the distinctiveness of lomography and raised the demand for creative photos.
The Lomo Effect can be added to any photograph by simply opening the image in photoshop and changing the RGB curves. For the images I edited in the gallery below I selected and changed the red, green and blue curves individually. For the red and green layers I dropped the shadows and raised the highlights and then pushed the shadows and dropped the highlights on the blue curve adjustment to create my effect.
From here I pulled the images through into Lightroom and added a very slight vignette to the images to slightly blur the borders and sharpen the centres.
|

|
|
Levitation Photography
The Jump Method
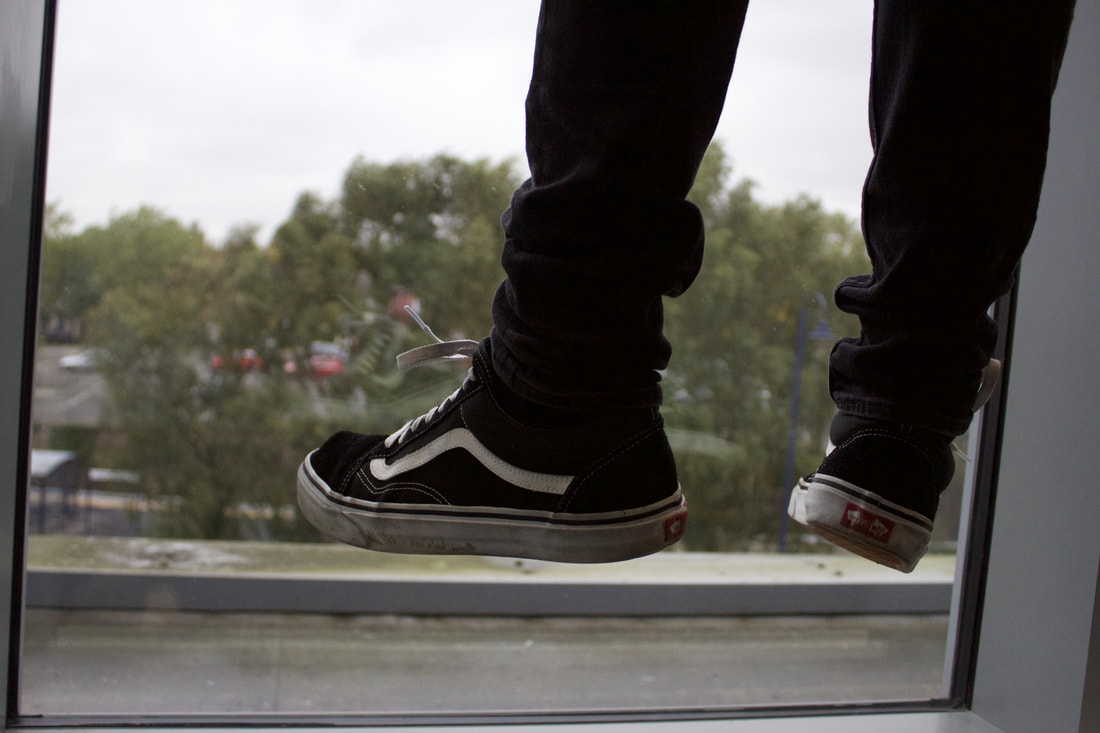
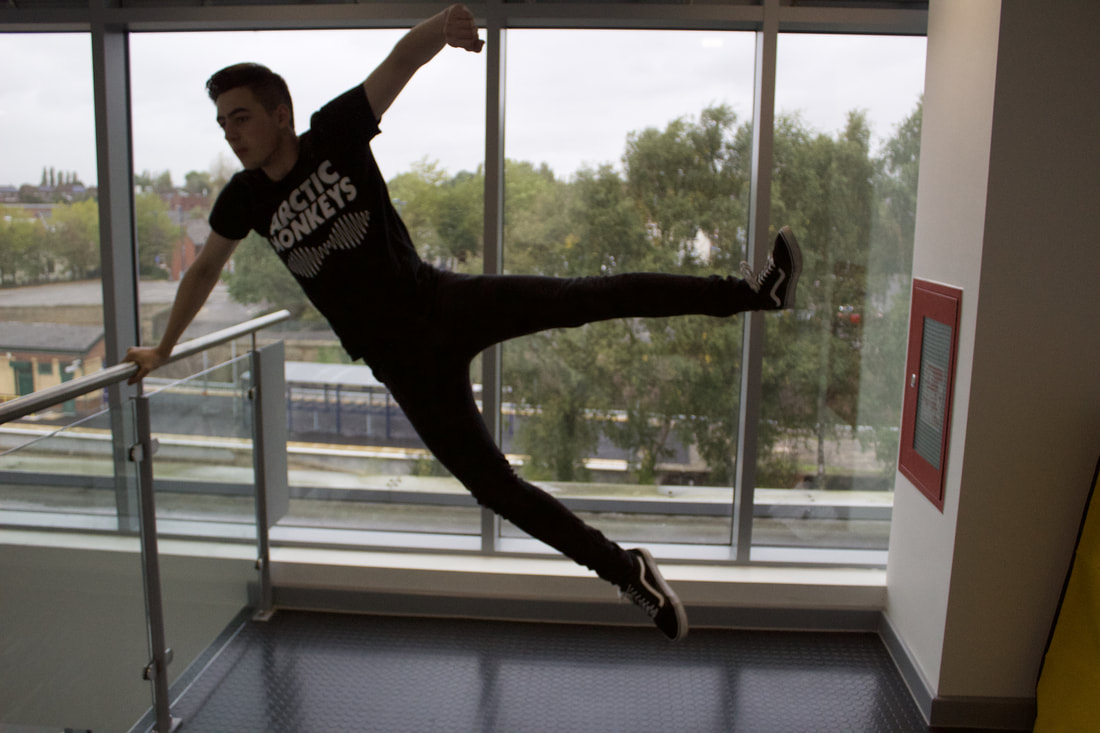
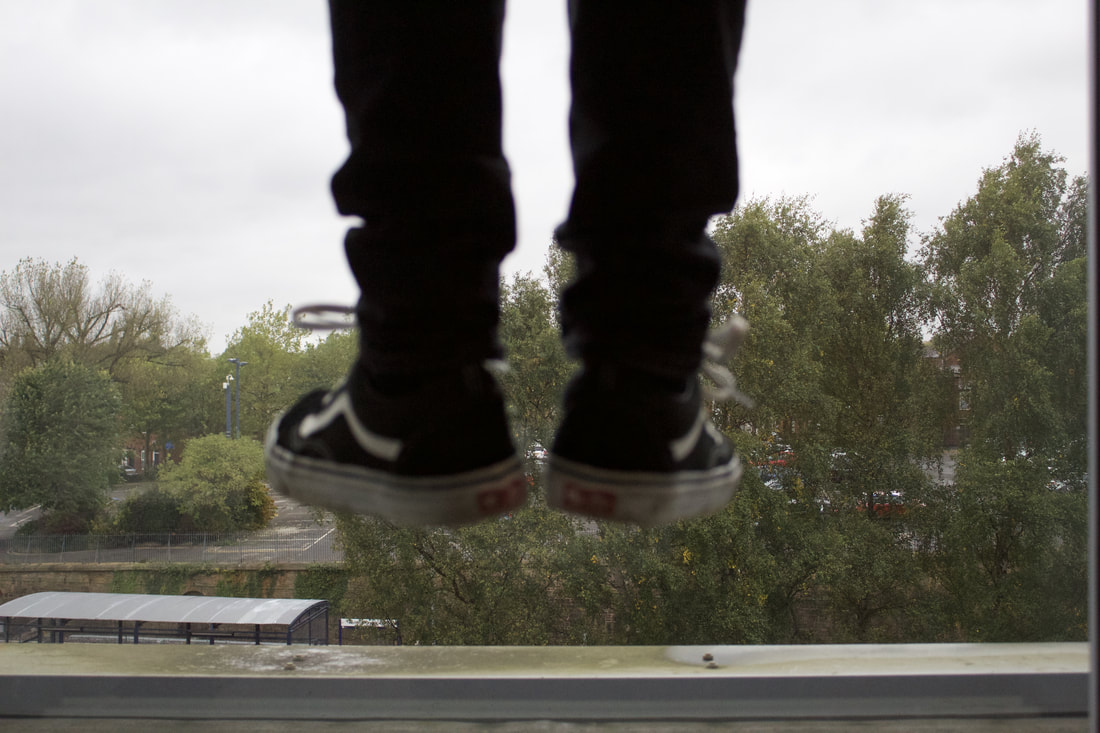
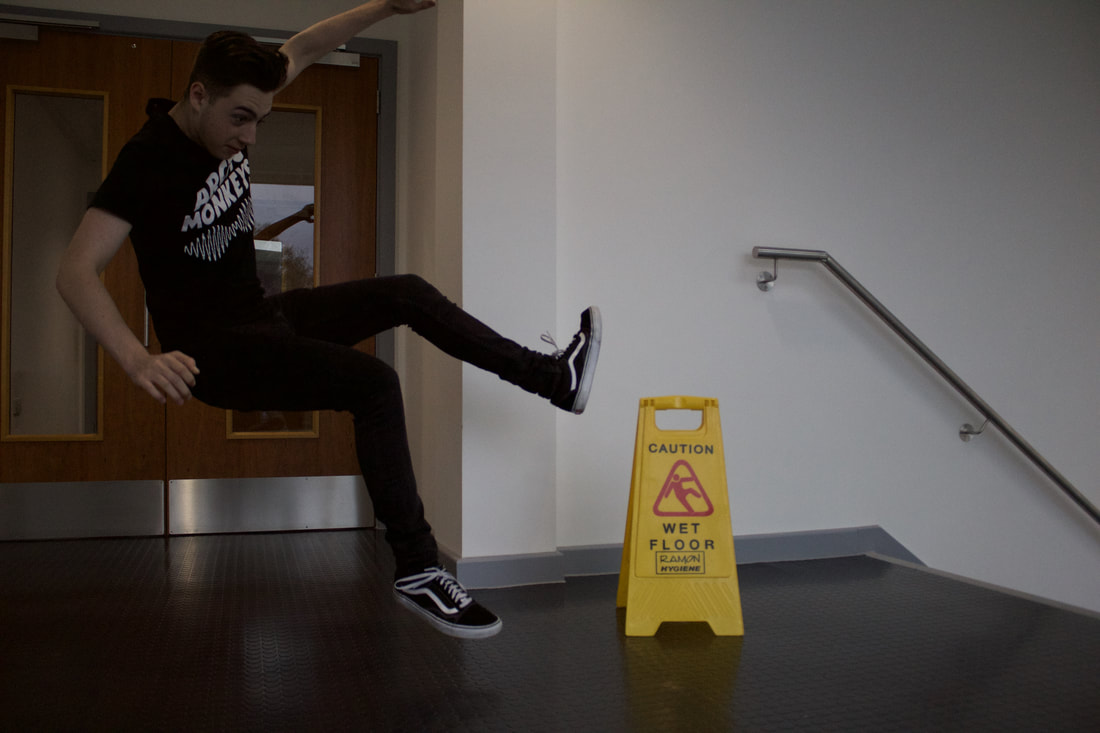
I tend to dislike the jumping method for a number of reasons: It’s difficult to make look natural, it requires care to not fall and get hurt, and it’s pretty exhausting to perform. My very first attempt at levitation photography is shown in the gallery below and I used the jumping method to make it.
Using only a DSLR camera and my group partner behind the camera, I got in front jumping and twisting my body at numerous angles to try and capture a good levitation pose. The camera was set to continuous shooting mode to try and capture as many potential frames as possible.
Every once and a while I would get lucky and actually grab a frame right at the apex of my jump. In the end I was actually pretty happy with the results.
I would like to say that this technique can work fairly well, but it’s very difficult to get right and nearly impossible to safely make a photograph with your head lower than your feet without face-planting as I found trying to get the shot in the bottom right of the gallery below. However the best part of this method is that it’s not necessary to perform any Photoshop editing to get the final result.
The Support Method
Although the jump method is reasonably effective, the best results in levitation photography are gained by using the method below. It will require more preparation and post-processing than just jumping, but it does open up the possibilities for composition. The support method is my preferred way to shoot a levitation photograph.
For the photograph below I used a college stool, which my group partner stood on and jumped off. Using a support of some kind was preferable to jumping because it was possible to place my partner in some more interesting and different poses. However the support method makes for a slightly more difficult shooting process. It requires compositing multiple images in post processing so it’s necessary to carefully execute the shoot for the best results.
Shooting Two Photos
This is where I went wrong in the image I took below. I only took one image of my partner and the stool when I actually should have taken two images: One with the stool and my partner and one without, showing just the scene. By taking these two photos with the camera in the exact same position and with identical framing I could have made my editing process much easier as I could simply place the two images on top of each other in photoshop and erase the stool.
However, my knowledge on levitation photography was very poor at the time of shooting I only had the one image meaning I had to use a mixture of tools such as the patch tool and the spot healing tool to try and remove the stool as best as I could. Although when viewed from a distance this just about works, upon closer inspection it is a very bad, patchy edit.
If I went out shooting levitation photography again with the support method I would ensure I take two images instead of just the one.
